Lesson 3
Discovering your Paths
Chapter 5: Making a git commit
Committing your robot project
Now that you have sharpened your programming skills, it’s time to make your robot project more exciting!
But before modifying your files, let us try to make sure that we can keep a history of all your previous version.
If you recall, in Lesson 2, you have turned your robot directory into a Git repository, or ‘repo’ for short.
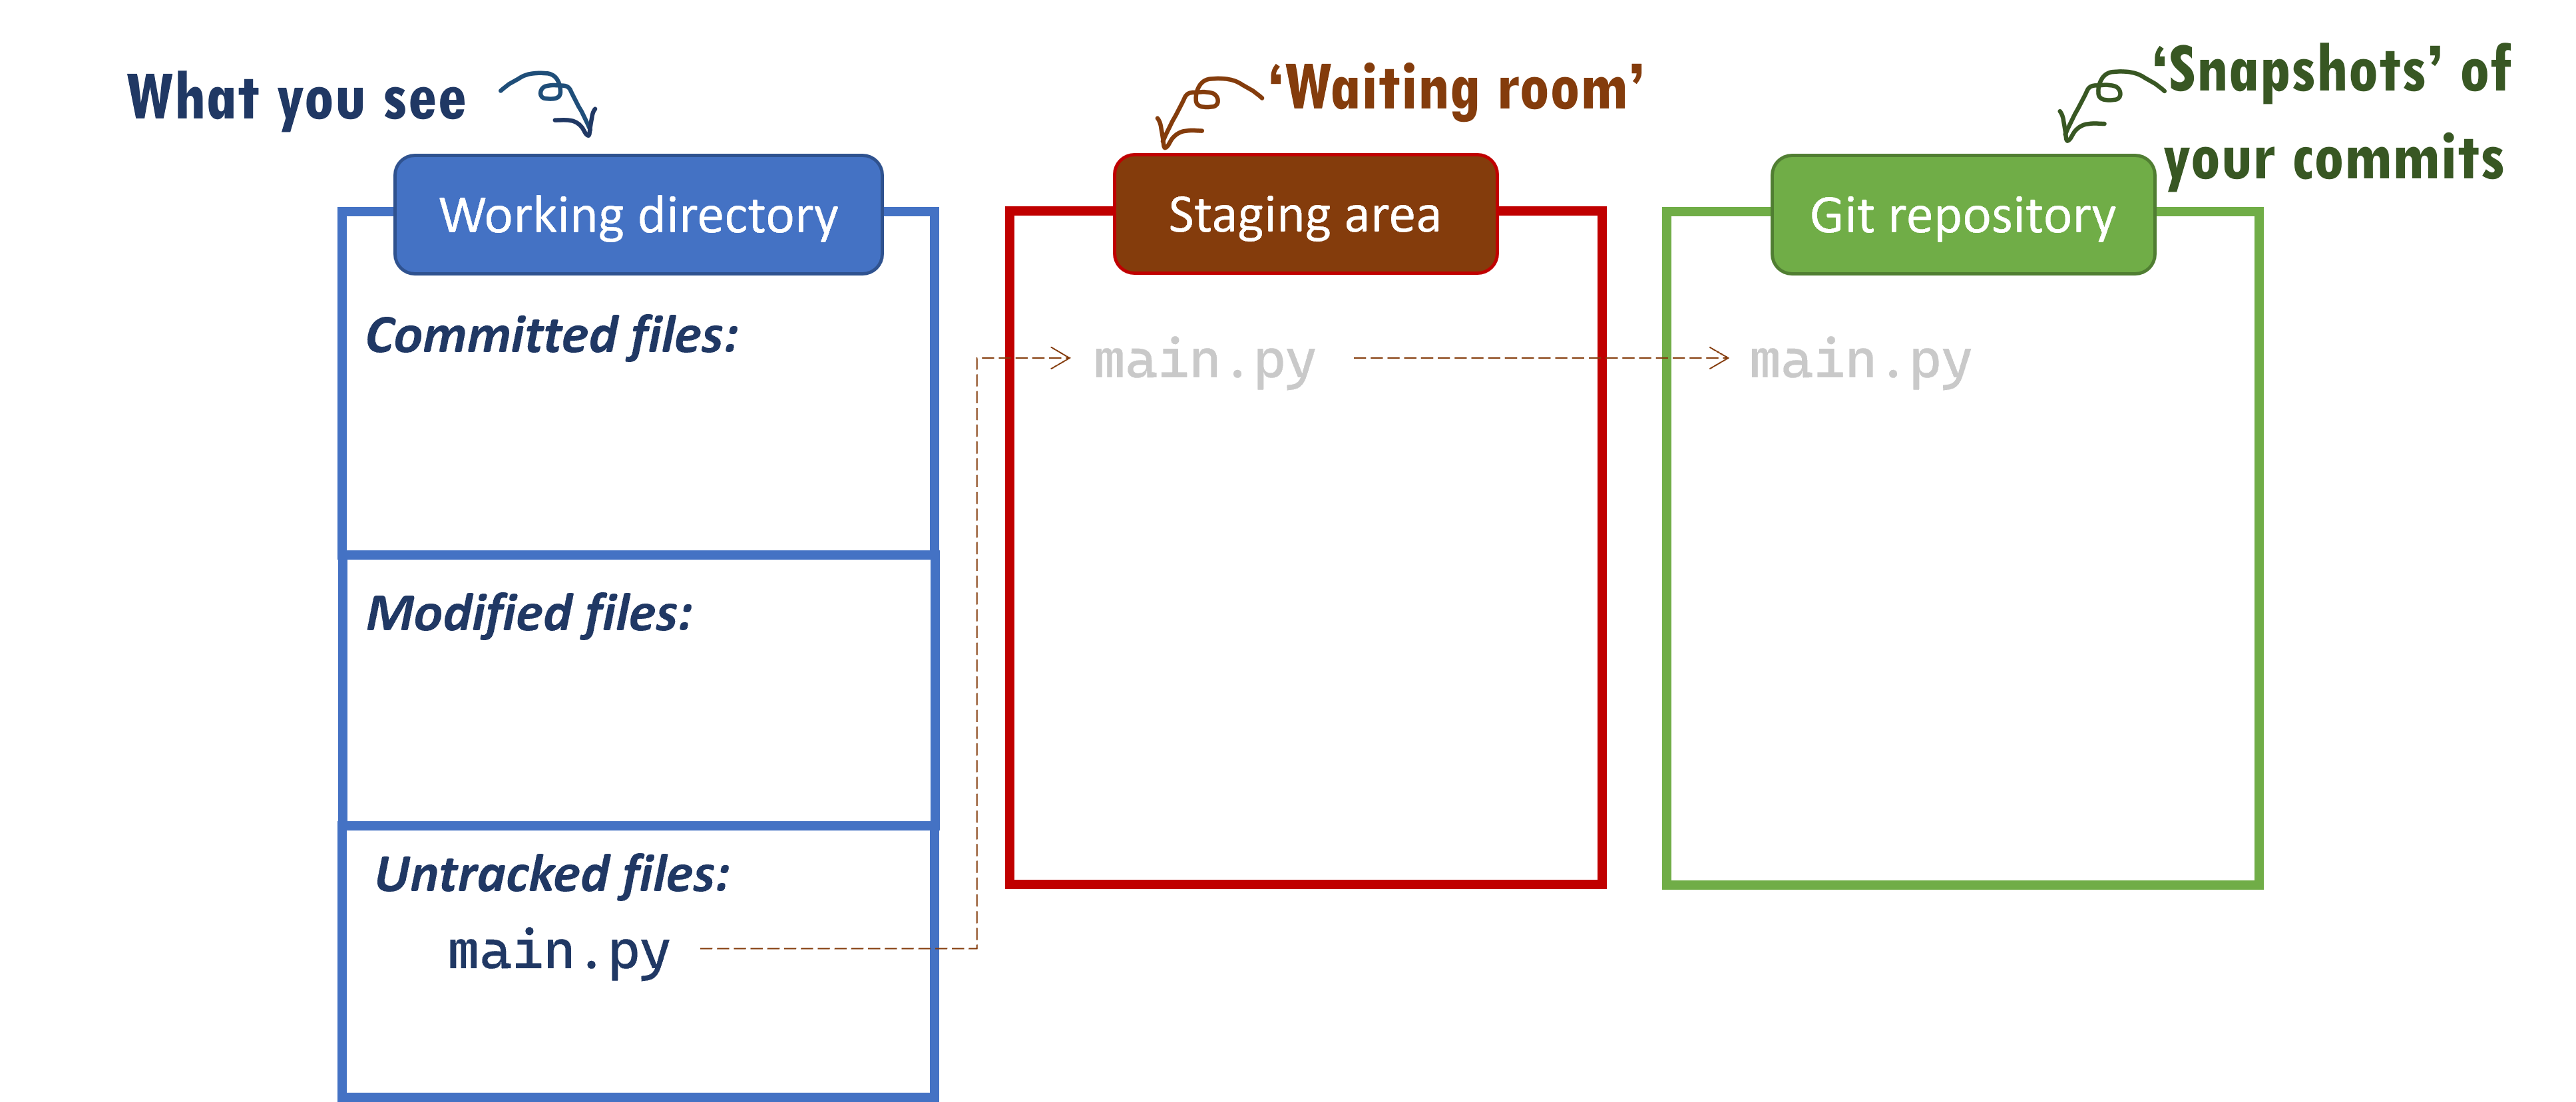
And as a recap, you need to think of the two ‘areas’ in a Git project:
- Git repository (the
.gitsubdirectory) - The working directory (your
robotdirectory)

At the moment, you have an empty repo, as you have not added any files to the repo yet.
You should also have a main.py file in your working directory from Lesson 2.
Let us now add main.py to your repo, so that you can track all changes to the file.
Before you add a file to your repo, you will first have to add it to yet another ‘area’ called the staging area.
The staging area is simply a ‘waiting room’ where you queue your files that you want to add to your repo. You will later ‘commit’ or save all the files in the staging area to your repo in one go.

