Introduction to Deep Learning with PyTorch
Chapter 8: Building and Training an AutoEncoder
Introduction
Similarly to the previous chapter, we provide here a step-by-step guide of the implementation of a basic Auto-Encoder.
The plan remains almost the same:
- Determining the characteristics of the model and how to train it (loss function, type of input, type of output, internal structure…)
- Implementing the model in PyTorch
- Training the model
- Refactoring to improve the clarity of our implementation
But first, let’s define our problem!
Problem setting
We have, as before, a set of black & white 28x28 images representing digits.
Consequently, all those images are quite heavy: each image is described by a vector with 784 dimensions! Those images may probably be described by fewer features, such as: the label of the digit, an equation of the shape of the digit… In other words, could we compress an image to only keep the relevant features present in it?
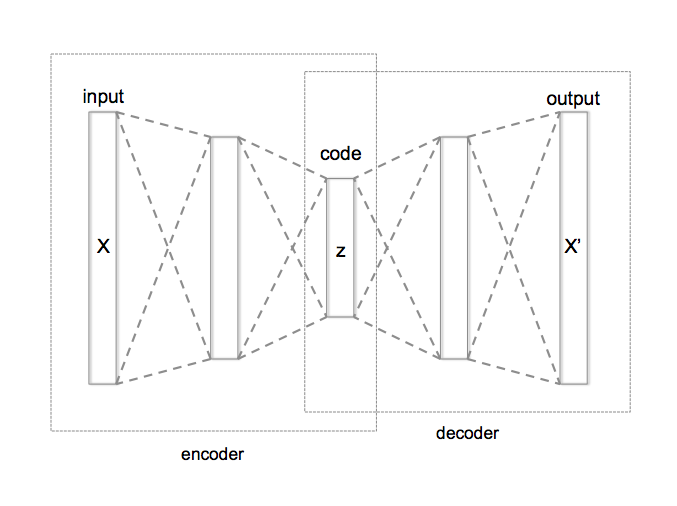
That problem is addressed by Auto-Encoders. The way vanilla Auto-Encoders work is straightforward:
- An Auto-Encoder is made of 2 components:
- an Encoder
- a Decoder
- The image is passed as input to the encoder, which compresses the image into a latent encoding (which we will also call: feature vector).
- Based on this latent encoding, the decoder then tries to reconstruct the original image.
The latent encoding of an image corresponds to the image compression we were looking for!
 `
`
